Access to all articles, new health classes, discounts in our store, and more!
A Guide to Gluten-Free, Sprouted Grain Sourdough
There is nothing like a hot, chewy flatbread with a salad for lunch, or a crusty loaf of bread with cheese and dry salami when you are on the road. However, many people are disillusioned with modern bread. Happily, there is a better and older way to make bread – a way that minimizes health risks and maximizes both nutrition and flavor. This way omits flour in favor of freshly sprouted grains. In this article, I will show you how to create gluten-free, whole grain, sprouted sourdough bread in your kitchen. Keeping this nourishing bread on your table is easy, and creating your supply of sourdough starter can add a pleasant daily rhythm to your home.
Sourdough starter supports good health in many ways. It reduces the carbohydrate content of grains, synthesizes B vitamins, improves digestibility of starches, breaks down antinutrients, and predigests proteins (which improves assimilation and reduces the likelihood of developing a food allergy or addiction). Compared with conventional bread made from the same type of grain, sourdough bread causes less of a blood sugar spike after meals.
These benefits are largely due to the beneficial microorganisms in the starter. Sourdough starter contains a community of yeasts and bacteria that feeds on flour and water. The cultures found in sourdough are diverse; an average starter contains about ten species out of over a hundred that are used to culture grain worldwide. There are literally trillions of possible combinations that could make up any given starter. Some species produce lactic acid, others acetic acid, and they all create flavor compounds. Every sourdough starter is unique, both nutritionally and in terms of flavor.
Most of the species found in sourdough starter are Lactobacillus (the same bacterial cultures that are used to make yogurt). Many starters also contain Saccharomyces (yeasts used to make bread and wine) and Acetobacter (bacteria that produce vinegar). Starters generally also contain a couple of “wild card” cultures from among dozens of other possible genuses.
Having a sourdough starter jar on your kitchen counter makes preparing meals fun and easy, because bread products made from soured grains cook more quickly than those made from traditional flour. When hunger strikes, you can have pizza or burritos on the table within half an hour. At the end of a long day, this is a huge gift!
For gluten-free families, sourdough also increases healthy baking options. If you have become accustomed to buying expensive and refined gluten-free flour mixes, you will be delighted to find that this is no longer necessary. Your body will thank you for eating only nutritious whole grains, rather than added ingredients such as corn, potato, and tapioca starch.
Making sourdough starter
It is easy to make sourdough starter from scratch in your own kitchen. Sandor Katz, author of Wild Fermentation, affirms that combining equal parts of water and flour on your counter and stirring it regularly is all that it takes. This is true, and it is where I began. However, the more I learn about the health benefits of sourdough, the more committed I am to creating starter that is potent from the first week. The more active and diverse the cultures are in your sourdough starter, the more it will promote your family’s health.
To reverse engineer a starter, I’ve added a little twist to Sandor’s method. Combine equal parts brown rice flour and water in a clear glass jar. The consistency should be that of a thick smoothie; some flours will require that you add more water. Next, add one dried date, one dried fig, or ten raisins. These fruits grow with yeast (Saccharomyces) on the surface of their skins. Stir in the contents of one capsule of probiotics (Lactobacillus). If you want to also add Acetobacter, stir in a very small amount of raw apple cider vinegar (it should say “with the mother” on the bottle).
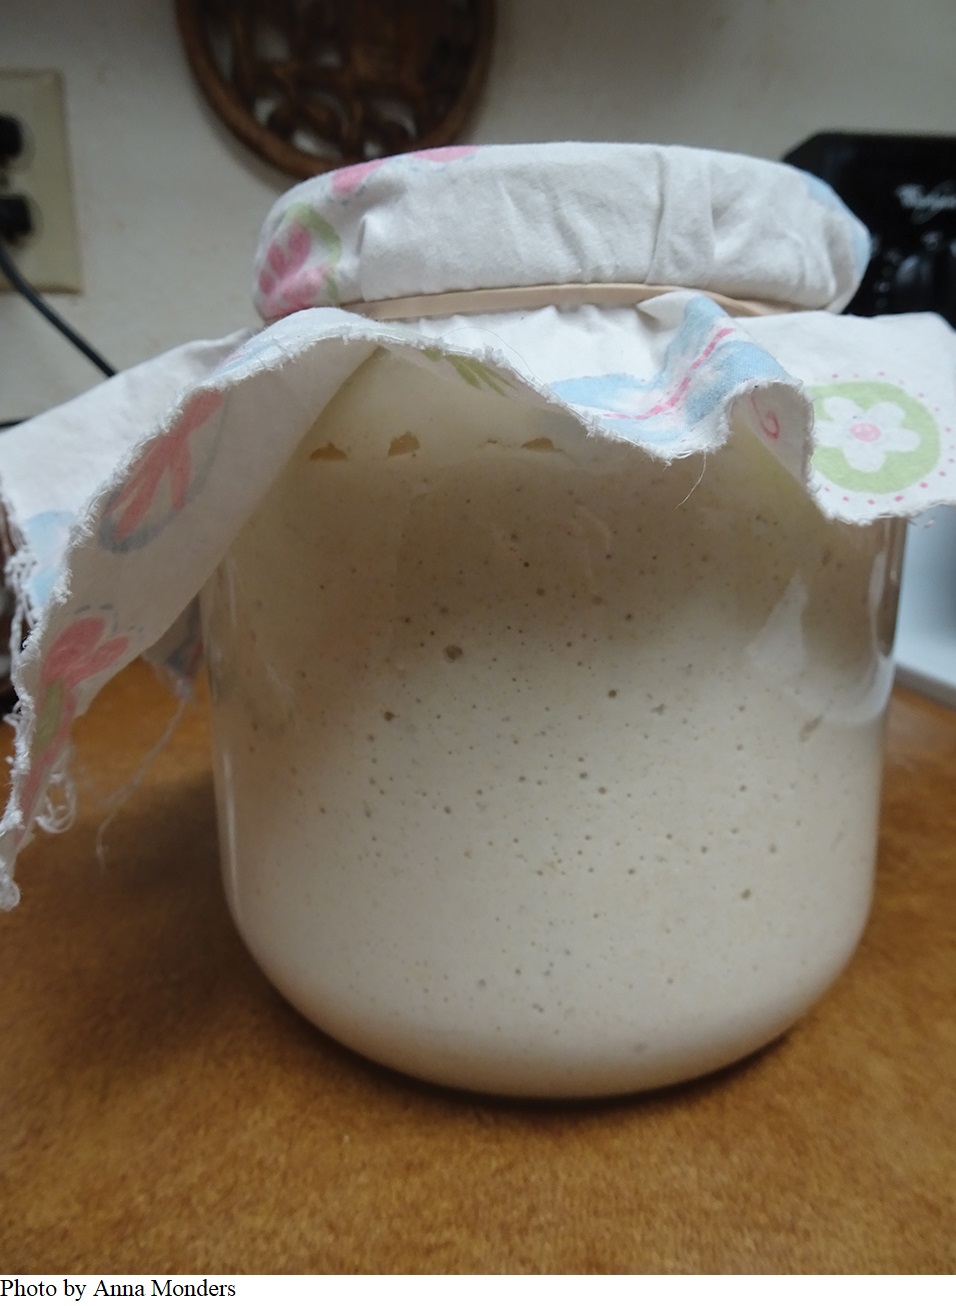
Stir your starter morning and night and watch for tiny bubbles to appear on the side of the jar. This usually happens in one to three days. If not, toss that batch and try again. You may get better results using filtered water and organic ingredients.
Once you start to see bubbles, even if they are only as big as pin pricks, it is time to begin feeding your starter morning and night. Simply add one spoonful of flour and one spoonful of water, and stir well. When liquid accumulates on top of your starter, pour it off before feeding your starter. Continue to monitor how thick the starter is; you may need to add water to keep a soft yogurt-like consistency.
 After a few days, if your starter is still doing well, you can start feeding it larger amounts of flour and water based on how much you need. Remember to stay consistent about feeding your starter every morning and night. If you skip a feeding, it will become so acidic that some species of bacteria will suffer. If you skip multiple feedings, your starter may not survive.
Should you ever need a break, simply feed your starter well, cover it with an airtight lid, and refrigerate. It will be fine for at least a month. When you remove it from the refrigerator, feed it, add lots of water to achieve the smoothie consistency again, and stir assiduously to remove all lumps. Allow it to culture for 12 hours before using it again.
The longer you continue to tend your starter, the more diverse your community of cultures will become. New cultures will join in from the air or from the grains you feed it. After a few months, you will notice that your starter has reached a new level of maturity in terms of flavor and leavening power, and this will continue to improve as time goes by. Ultimately, you will see a beautiful curd-like structure when you stir your sourdough. When you bake bread, this curd will be transformed into a really beautiful crumb.
Flourdough
There will come a time when your starter is overflowing from the largest jar you have. This is the time to make flourdough. Essentially, this recipe turns your starter back into flour, which you can then use cup for cup in any recipe that calls for flour. This makes a moist, delicate crumb that is perfect for cakes. (See the recipe for Anna’s Chocolate Cake below.) In addition, it is incredibly easy to digest and, compared to other flours, better for your health.
To make flourdough, pour starter into a glass lasagna pan or, for smaller amounts, onto a plate. Allow it to dry, mashing it twice daily with a fork or potato masher for a few days. If you have a seed-sprouting mat or heating pad, you can put this on low under your lasagna pan. It will greatly speed the process; typically, your flour will be dry after only 24 hours.
When it appears thoroughly dry, process the flour in a blender to break up any clumps. Then put it through a flour sifter if you have one. Now it is ready to use. Store it in an airtight container in the freezer.
Sprouting grains
A good reason to begin sprouting, or germinating, whole grains is that it will greatly improve the flavor and texture of your baked goods. However, there are some very real health reasons to sprout grains as well.
One problem that disproportionately impacts individuals on a gluten-free diet is the presence of heavy metals, especially arsenic, in rice. Historically, arsenic was used as a pesticide in rice paddies, and it has persisted in the environments where rice is grown. To make matters worse, rice has an affinity for absorbing arsenic.
 Luckily, there are actions you can take to minimize this problem. Buying rice from responsible growers is a good first step. Lundberg Farms, whose California-grown rice is available throughout the United States, tests its rice for arsenic and holds itself to European baby food safety standards. Avoiding hidden rice products (such as brown rice syrup) in processed foods can also decrease exposure. Lactic acid bacteria found in fermented foods can bind to heavy metals in the gut, assisting their excretion – so, serve yogurt, kimchi, kefir, and kombucha at your table.
The reason that many of my recipes contain rice is that its mild flavor and texture make it much more adaptable than sorghum and teff (the other gluten-free grains that function properly as sourdough starter). Happily, the process of sprouting greatly reduces the arsenic content of rice, because the first step is soaking rice in water. This treatment, also known as steeping, opens up the structure of the grain and allows some of the arsenic to leach into the water and be drained away.
Sprouting also makes it easier to diversify a gluten-free diet. Germination improves the texture and palatability of every grain, making it easier to incorporate buckwheat, millet, quinoa, teff, sorghum, and even wild rice into your baked goods.
Germination also improves the nutritional profile of grains in similar ways that fermentation does: decreasing carbohydrates, reducing antinutrients, improving assimilation, and predigesting both starch and protein. Neither sprouting nor souring removes antinutrients completely, yet when used in conjunction, they are extremely effective. When antinutrients are broken down, not only do they cease to disrupt digestion, but their mineral components (including zinc, magnesium, and calcium) are made bioavailable.
Finally, sprouting makes it possible to reduce consumption of oxidized fats and proteins, which are often found in flours. This is important because oxidation is associated with both inflammation and aging. Grains that have been ground into flour can start to oxidize within hours, but when you use sprouted grains in your kitchen, you have the option of grinding them immediately before use.
Cereal grains have built-in protections against being consumed by predators. These are the antinutrients mentioned earlier, and they include phytates, oxalates, and tannins. When seeds are produced by the plant, these antinutrients are at their peak. If the seeds escape predation, they fall on the ground, are activated by moisture in the soil, and become ready to germinate. At this point, the antinutrients are transformed to make essential substances available for the plant’s growth.
We can mimic this process in our kitchens in order to reduce antinutrients and make the healthful substances found in grains available for our own nourishment. The steps to successful sprouting are simple: soak, drain, and rinse.
Sprouting grains, also known as malting, is not at all new. Those familiar with beer-making will know that brewers malt their grains for the best flavor. This process also benefits the flavor of bread. As you might imagine, green malted (meaning the grains were not dried after sprouting) bread has been around for a very long time. A recipe for bappir, germinated barley bread, was found on a cuneiform tablet from Mesopotamia dating from around 3,800 BCE. Of course, in those days, there was no rapid rise yeast, so it is likely that the bread was sourdough.
Making sprouted starter
Begin by sprouting rice to feed your starter. The process is very easy. Soak the rice in water for 12 hours. Drain off the water, and allow the rice to sit for 12 hours. Rinse and drain, then allow the rice to sit for another 12 hours. At this point, if you look closely, your rice grains will start to resemble penguins—they will have a tiny beak at one end. This is the first sign of germination. The signs of sprouting in rice, in comparison to other grains, are subtle. However, this little bit of growth is all that it takes for your rice to be ready for use. Starter that is fed with finely ground, sprouted brown rice can be used in any of the recipes found below, and will provide results far superior to sourdough made from flour.
Incidentally, any raw grain can be sprouted, and the process is the same for all the gluten-free grains. If you plan to sprout large quantities of grain, it is important that the sprouts have access to oxygen, both for their growth and to keep the whole operation hygienic. After soaking the grains in a bowl, you may transfer them to a cloth “nut milk” bag to hang in your kitchen between rinses. Alternatively, you might find that stainless steel wire mesh colanders are handy. Whatever you use, make sure to send it through the washing machine or dishwasher after you use it. Healthy sprouts have a light vanilla or cheese-like scent. If your sprouts ever start to smell foul or soapy, put them on the compost pile. This is a rare occurrence in well-rinsed sprouts. (Be aware that consuming raw sprouted grain may cause food poisoning due to contamination with pathogenic bacteria.)
Depending on the equipment in your kitchen, you have two options for grinding the sprouted rice. If you have a standard countertop blender, you can blend a small amount of sprouted rice twice a day and feed it to your starter. If you have a high-powered blender or food processor, you can sprout a large quantity of rice, grind it, and freeze it in ice cube trays. Then, just once a day, feed your starter some frozen “rice cubes” and return to stir it after they have melted.
Using a standard countertop blender: If you have a blender blade that can attach to pint jars, it will often be easiest to blend just a little sprouted rice each time you feed your starter. Put ⅓ cup of short grain brown rice in a pint jar and cover with water. Allow it to sit for 12 hours, then pour off the water. Allow it to sit for another 12 hours, rinse, and let sit 12 hours more. Add water just to the top of the rice, attach the blade, and blend away to make a slurry. Once it is smooth, feed it to your starter. If your starter doesn’t tend to get very bubbly, give it a small spoonful of flour as well. If you use this method, there should always be three jars of sprouting rice on your counter, so that every 12 hours a new jar of germinated rice is ready to use.
Using a food processor or high-powered blender: Soak six cups of short grain brown rice in a big bowl of water overnight. Pour off the water or pour it through a large stainless steel mesh colander. Allow the rice to sprout for 12 hours, rinse, drain, and allow to sprout for 12 hours more. You should see tiny tails on the grains. Before making a slurry, you may wish to reserve a small amount of the sprouted rice to cook for a meal that day—the flavor, texture, and digestibility will be highly improved in comparison to those of unsprouted rice.
If you are using a food processor, set it up with the standard blade. Fill it four inches deep with sprouted rice, and grind until the rice starts to take on a flour-like appearance. Next, add water until a smoothie texture is accomplished, and continue to process until the slurry is no longer gritty.
If you are using a high-powered blender, fill the pitcher two-thirds full with sprouted brown rice. Add four cups of water and blend. Keep adding water until a smoothie texture is reached. Continue to blend until it is no longer gritty.
Pour the rice slurry into ice cube trays. Repeat the process until all the sprouted rice has been used. After the ice cube trays are full, put any leftover slurry in the refrigerator until ice cube trays become available.
Making a sourdough sponge
If you would like to experiment with a wider variety of grains in your baked goods, there is one last technique to explore. This will enable you to make light and fluffy Millet Flapjacks, and moist and mellow Red Quinoa Bread (see recipe section below). Making a sourdough sponge allows even the quirkiest of gluten-free grains to shine. If you need to avoid rice in your diet or you have other food sensitivities, a sourdough sponge can be a huge boon.
A sponge is made by adding sourdough starter to a mixture of ground grains and water, and allowing it to rise before continuing with a recipe. Make only as much as you need right away, because millet, quinoa, buckwheat, and amaranth do not thrive as starters.
It is best to begin with whole grain. Sprout it, blend it with water, mix in a tablespoon of starter, and then culture it for at least four hours. This maximizes flavor, texture, and health benefits.
Recipes
Flatbread
This recipe is chewy, satisfying, and easy to make. Since the rice in your starter is both sprouted and soured, it cooks beautifully and has a luscious flavor. This is a wonderful recipe to turn to when you have excess starter. It also works well to add cheese and pizza toppings while the flatbread is still in the skillet it was cooked in. Cover and heat until the cheese is melted.
- 2 teaspoons coconut oil
- ⅓ cup sprouted rice starter
- ¼ teaspoon salt
- ½ teaspoon herbs or spices (optional)
Heat a skillet until it is quite hot but not smoking. Add coconut oil. Using a metal measuring cup, dip out starter and pour it into the pan. Spread it around with the back of the measuring cup until the flatbread is a uniform thickness. With your fingers, sprinkle salt onto the flatbread from 6 or 8 inches above. Then, if desired, follow with oregano, Italian seasoning mix, za’atar, toasted cumin, or chili powder. Cover and let cook until the top of the flatbread no longer looks raw. Do not flip. Remove lid and allow to cook a few minutes more. When your flatbread is firm, not floppy on your spatula, transfer it to a wire cooling rack. This is heavenly when eaten within a few hours; please do not freeze, store, or stockpile.
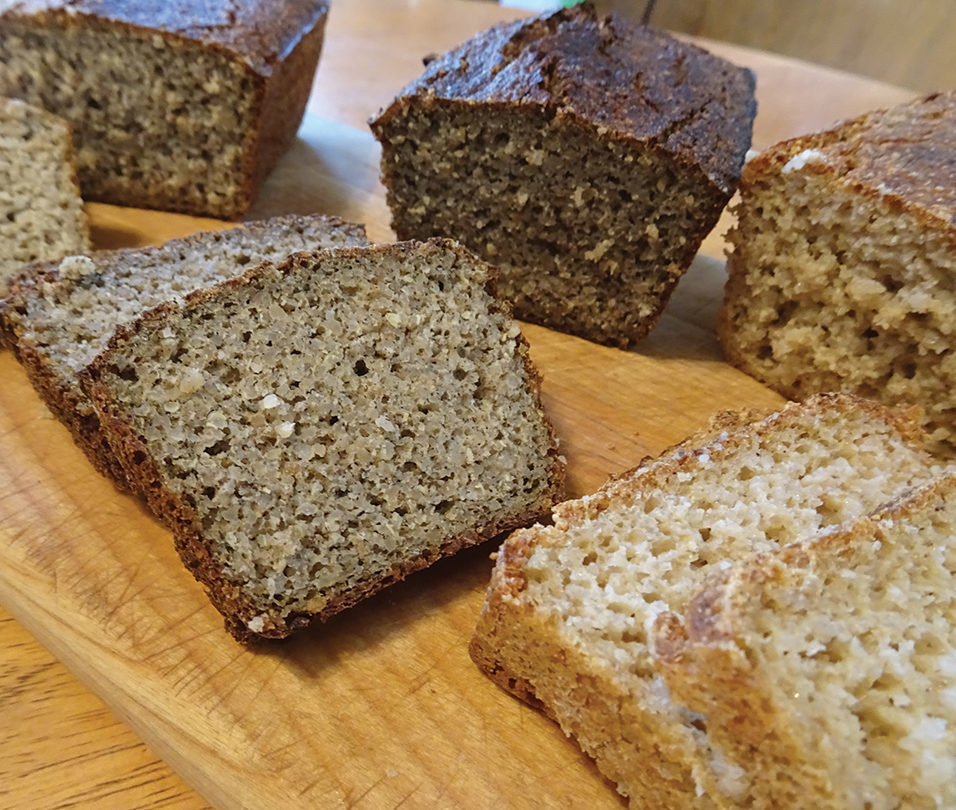
Artisan Bread or Pizza Crust
This bread has a wonderful flavor and stays soft all week long. It is delicious on its own, in a sandwich, as a base for grilled cheese – you name it.
- ¾ cup buckwheat (avoid kasha, which is toasted and will not sprout)
- ¾ cup quinoa
- ¾ cup water
- 1 egg or additional ¼ cup water
- 1½ teaspoons salt
- 1½ cups starter
- Coconut oil, parchment paper, or both for the pan
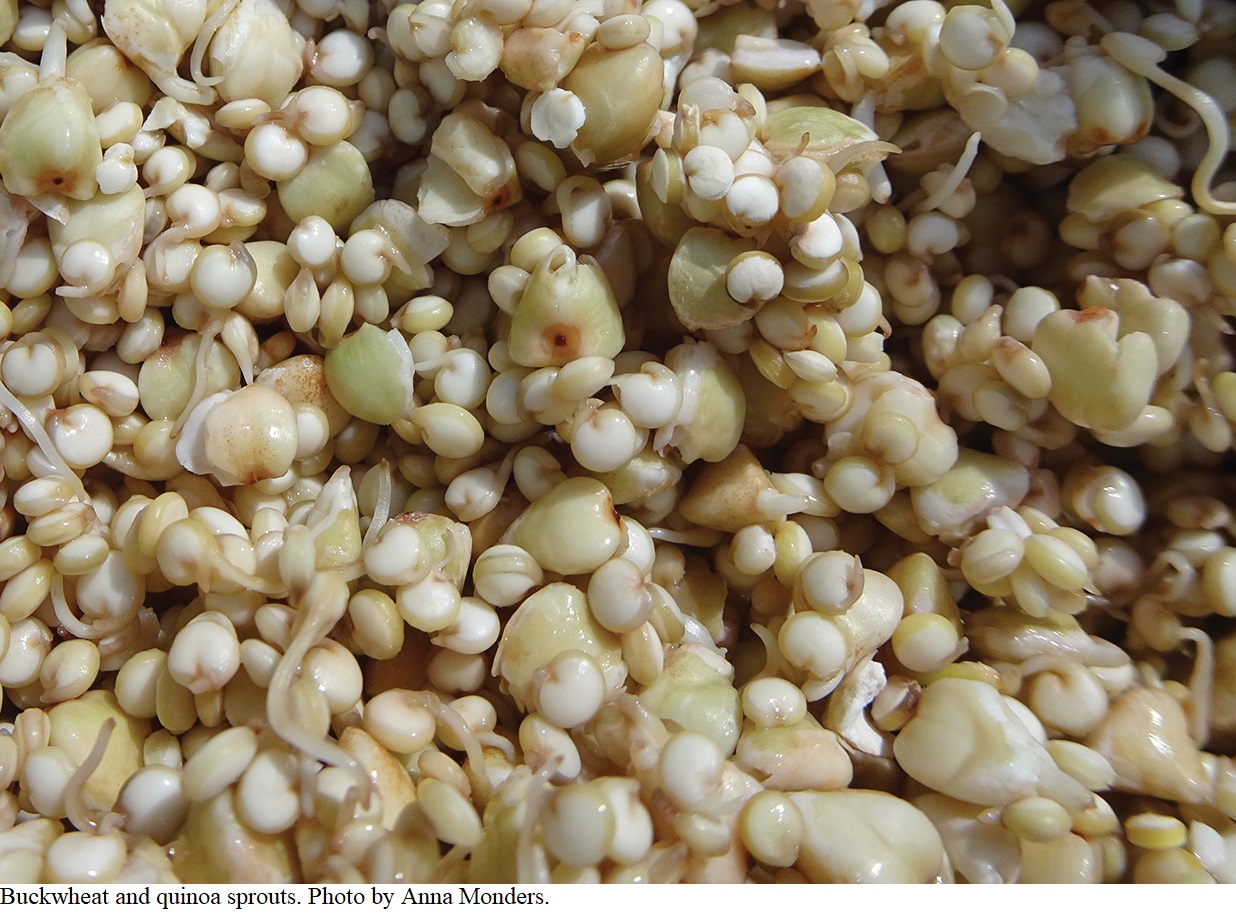
Combine buckwheat, quinoa, and a generous amount of water in a bowl. Allow to steep for 12 hours, then pour into a mesh colander or nut milk bag to drain for 12 hours. Rinse and allow to drain for another 12 hours, or until both quinoa and buckwheat have tails. Cold weather may slow the sprouting process; just keep rinsing every 12 hours until the sprouts are ready. (See photo of buckwheat and quinoa sprouts.)
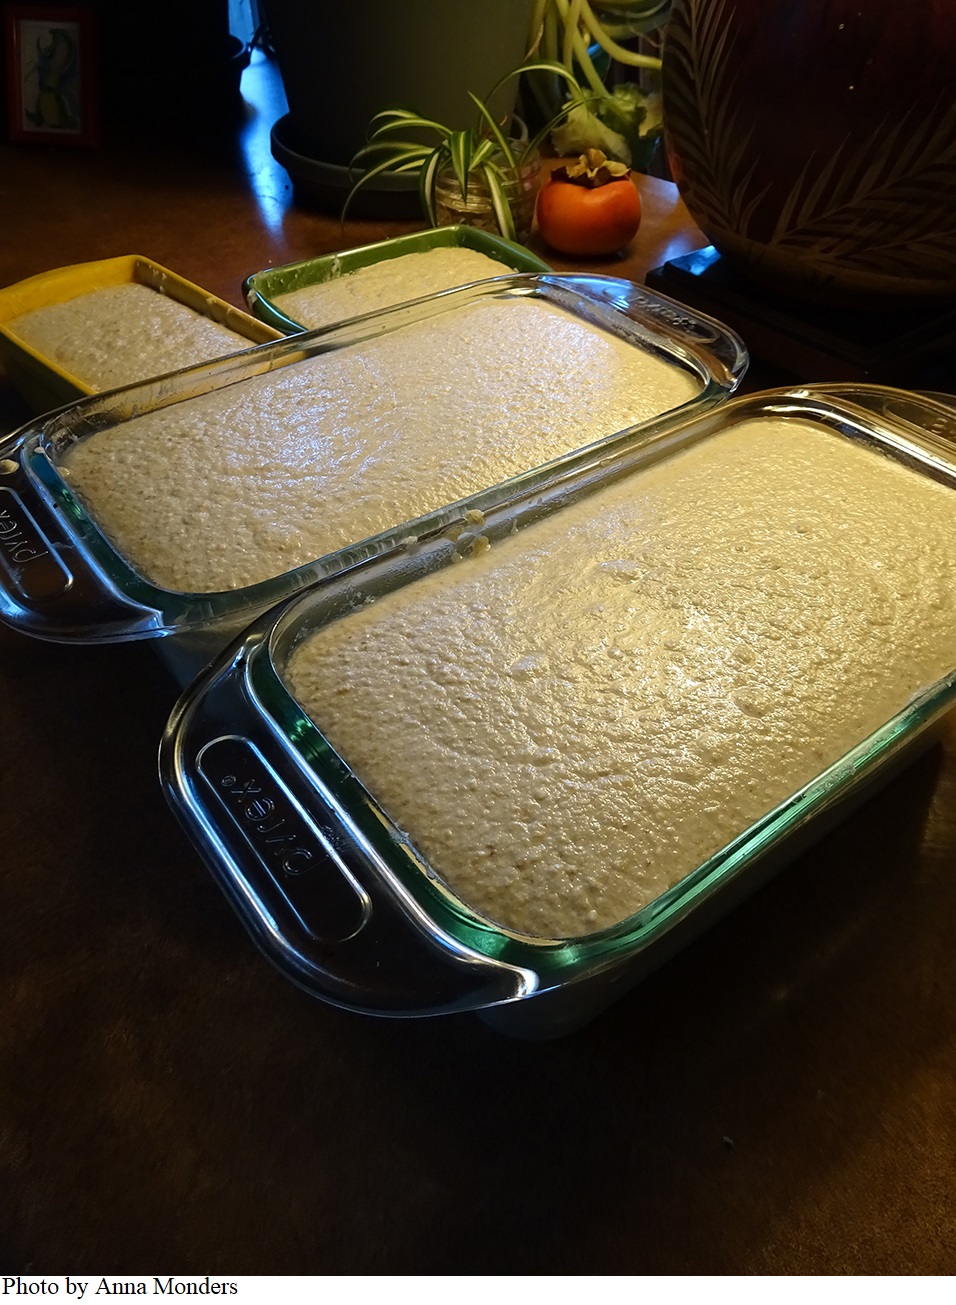 When you are ready to make bread, prepare a glass or ceramic loaf pan. If you are making pizza crust, prepare four pie plates. For recipes containing egg, grease pans with coconut oil and set aside. If you are not using egg, line the pans with parchment paper. If the parchment paper is not coated with silicone, grease it with coconut oil.
Combine sprouts, water, egg or additional water, and salt in the blender. Blend until smooth, then pour into a bowl. Add starter and mix well. Pour into the prepared pans. If you are making pizza crust, use about ¾ cup of dough per standard pie plate. Allow to rise for at least four hours, preferably until a slight dome forms.
Preheat oven to 400º F. Bake bread for 10 minutes, then turn oven down to 350º F and bake for another 40 minutes. Bake pizza crust for 20 minutes at 400º F. Bread and pizza crust are done when they are golden around the edges and the top is firm when tapped. Remove from pan; bread crust should be a consistent, deep golden color, without pale patches. If not, return to the oven for another 10 minutes. For pizza, top with cheese and return to the oven until the cheese is melted.
Anna’s Chocolate Cake
- 1 cup sprouted brown rice flourdough
- 2 tablespoons cocoa powder
- 1 tablespoon carob powder
- 1 teaspoon non-aluminum baking powder
- ½ teaspoon baking soda
- ¼ teaspoon salt
- 1 egg
- 2 tablespoons liquid oil, such as almond or olive
- 3 tablespoons coconut milk
- ¼ cup applesauce
- ½ teaspoon vanilla extract
- 1½ bananas, mashed
Topping
- ¼ cup cocoa butter
- ¼ cup coconut butter
- 3 tablespoons carob powder
- Chopped walnuts
Preheat oven to 350º F. Grease a small casserole dish (under 2 quarts, around 6-inch diameter). Combine dry ingredients and set aside. Combine wet ingredients. Stir wet and dry ingredients together, transfer to baking dish, and bake for 30 minutes. Remove from baking dish and let cool.
Once the cake has cooled, make the topping. Combine cocoa butter, coconut butter, and carob in a double boiler and heat until melted. Pour onto cake and allow to run down the sides. Sprinkle chopped walnuts on top.
Millet Flapjacks
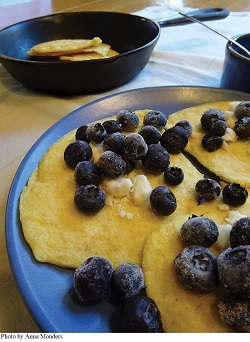 Millet, a dense and heavy grain that generally takes a very long time to cook, transforms into light, fluffy flapjacks with natural overtones of vanilla in this easy recipe made with a millet sponge. There is nothing like the smell of these flapjacks!
Sponge
- ½ cup unhulled millet
- Water, for soaking
- ⅓ cup water, for blending
- 1 tablespoon starter
- Flapjacks
- 4 eggs
- ½ teaspoon salt
- Coconut oil
Place millet in a jar or bowl and cover generously with water. Drain after 12 hours. Allow to sit for 12 hours, then rinse and drain again. After another 12 hours, your sprouted millet should start to smell sweet and show tiny white sprouts. Add ⅓ cup of water and use a blender to grind up the millet grains into a dreamy yellow batter. Add starter and allow to culture for 4 to 12 hours.
To make flapjacks, preheat a pan until it is hot. Meanwhile, add eggs and salt to the cultured millet. When a drop of water sizzles in the pan, add ¼ teaspoon of coconut oil and cook three pancakes at a time. Flip when flapjacks look dry around the edges and a couple of bubbles have popped. Add more coconut oil to the pan before each batch.
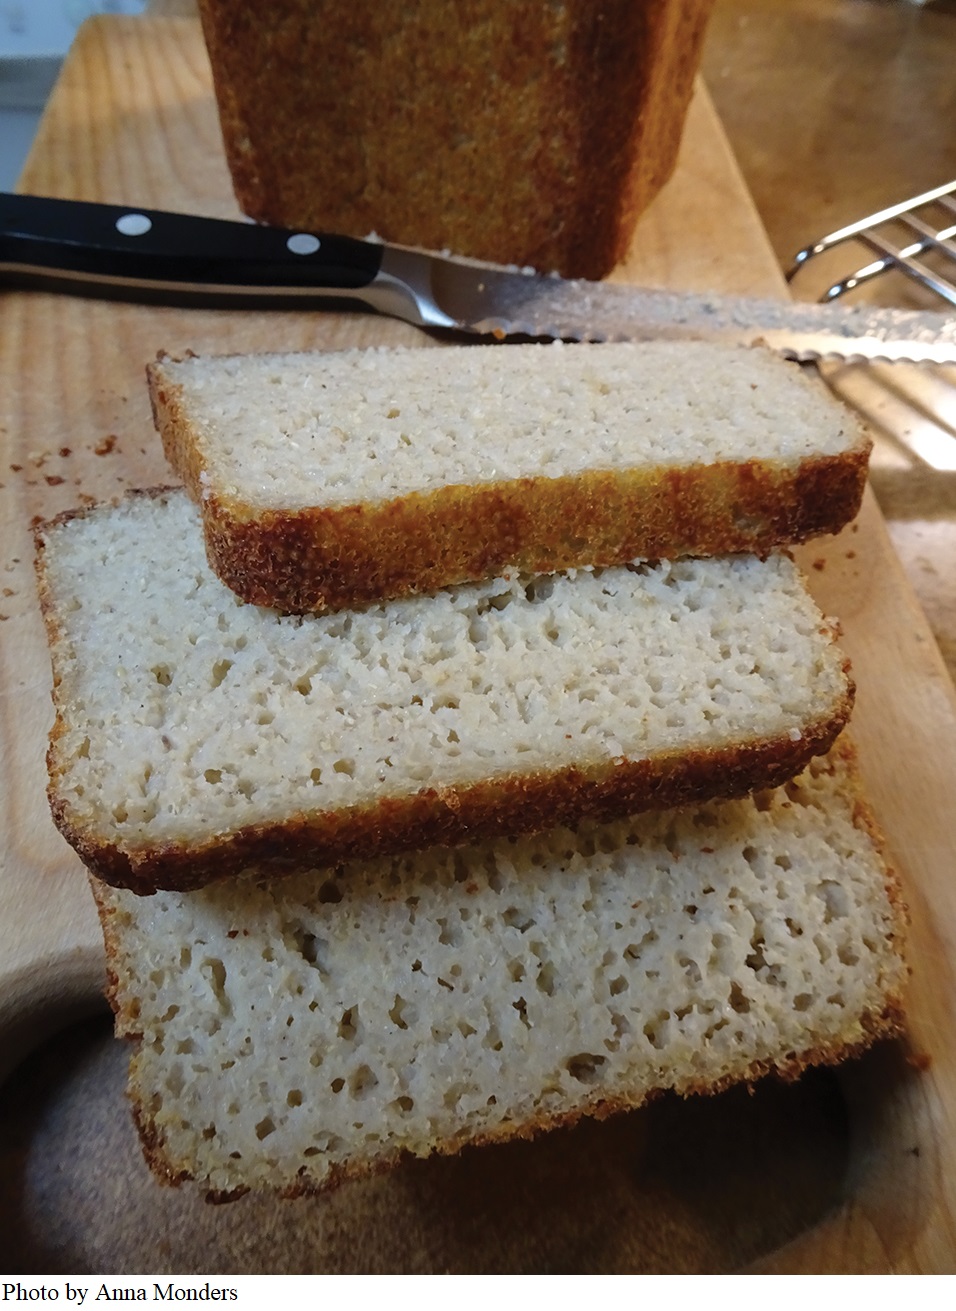
Red Quinoa Bread
A red quinoa sponge results in bread that is incredibly moist and has a lovely malted flavor.
Sponge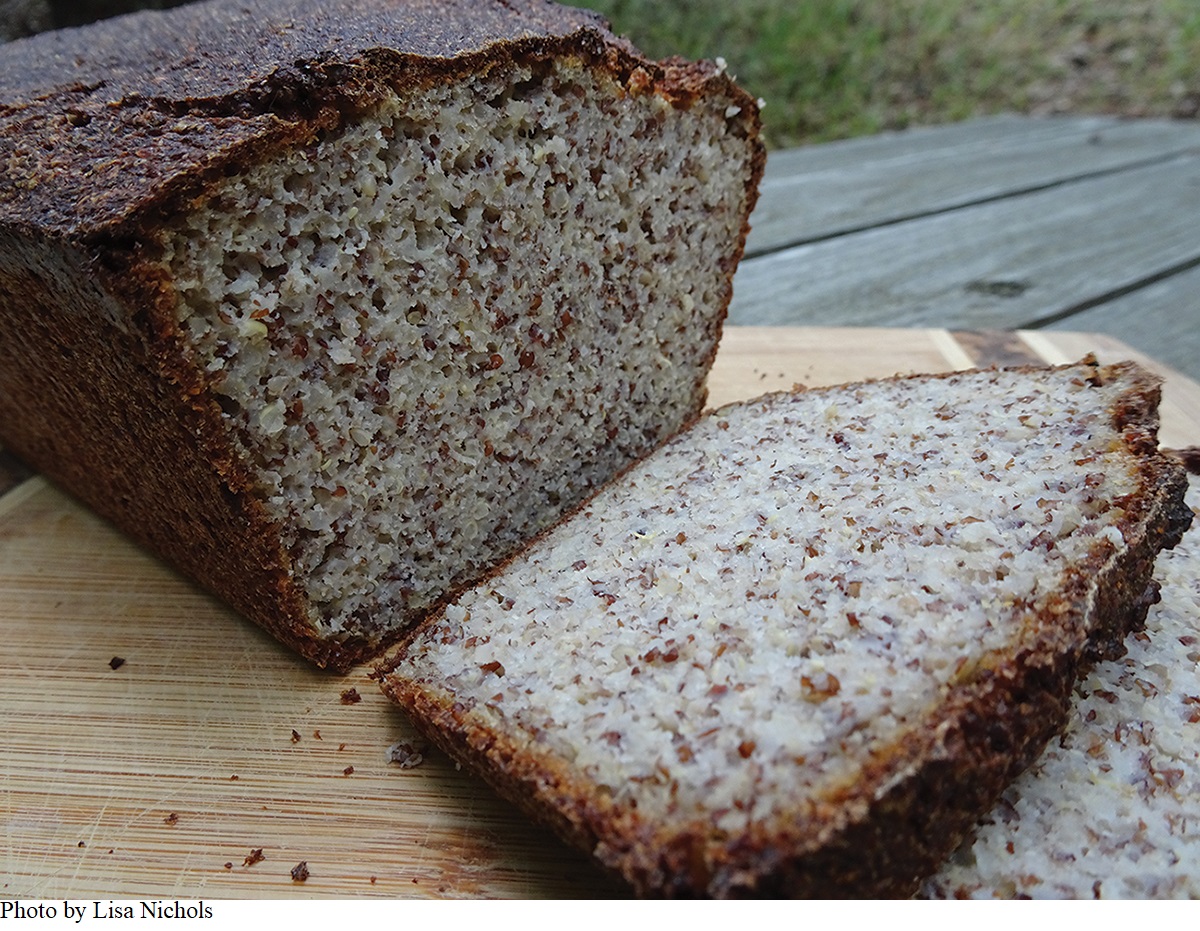
- ¾ cup red quinoa
- Water, for soaking
- ½ cup water, for blending
- ⅛ cup brown rice starter
Bread
- ¾ cup buckwheat
- ¾ cup white quinoa
- ½ cup water
- 2 eggs (or ½ cup milk, coconut milk, or water)
- 1½ teaspoons salt
Put red quinoa to soak in a pint jar, and buckwheat and white quinoa to soak in a bowl. After 12 hours, drain both containers. Rinsing twice daily, let the buckwheat and white quinoa germinate; the red quinoa should not be rinsed. After 24 hours, the red quinoa will have tails. Add ½ cup water and blend it in the jar. Red quinoa is a hard grain and will not break up completely; it is okay to still see fragments of it. Add brown rice starter to make a red quinoa sponge.
Once the red quinoa has bubbles, indicating that it is active, you can proceed with bread making. Grease a bread pan. In the blender, combine the germinated buckwheat and quinoa with ½ cup of water, eggs (or milk or additional water), and salt. Once smooth, pour into a mixing bowl and add the red quinoa sponge. Stir well and turn out into the bread pan. This bread rises quickly, so keep a close eye on it until it domes. This usually takes two or three hours. Then bake at 350º F for 50 minutes.

About the Author
 Lisa Nichols grew up in a kitchen where everything was made from scratch. She was exposed to Dr. Weston A. Price’s work in 1998, and earned a BA in Psychology at Boston University in 2002. Lisa is passionate about the intersection of nutrition and mental health. She is the Holistic Chef at Inner Fire, a healing community for those wanting to recover from life challenges without the use of psychotropic medications. Lisa developed her sourdough recipes over the past seven years and is working on a full-length cookbook. She can be reached at [email protected].
Published in the Price-Pottenger Journal of Health & Healing
Winter 2020 – 2021 | Volume 44, Number 3
Copyright © 2020 Price-Pottenger Nutrition Foundation, Inc.®
All Rights Reserved Worldwide